Autodesk Inventor iPart best practices

Scott Moyse
Product and Platform ManagerHave you ever wondered if there is a right way to manage your iParts? Do you often suffer with iPart members not generating how you would expect them to? Or regenerating the members results in broken links within your designs? Are you happy with the way your iPart member folders are named? If you are wondering what the answer is to any of these questions then read on.

Controlling folder names and file names
Setup your iPart following standard steps, which can be found here.
Tip: Make sure you don’t use any special characters in the Member name or Filename columns within your iPart Table. It can create undesirable file naming problems, or errors appearing when switching between different iPart members.
Then rename the top browser node (left), type in the name of the folder you would like the iPart members to be saved to.
Just remember the Top Browser Node (Green Rectangle), ISN’T the filename. This is just a workaround to control the name of the folder the iPart Members get published/generated/saved to.
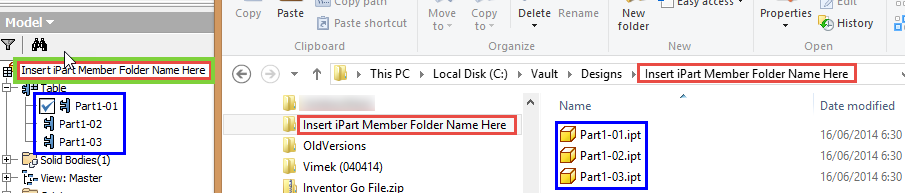

The actual file name can be found in the iProperties dialog if you need it (left).
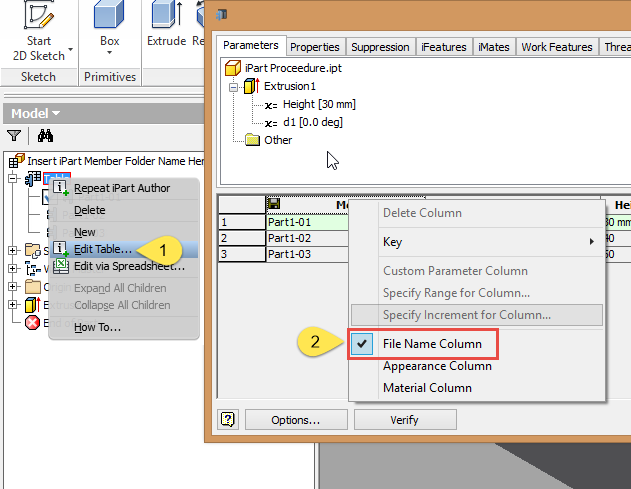
The filename of your iPart members is controlled in the iPart table, by setting the column you want to become the filename. By default, this is the Member name column (right).
Generating Members
Rule number 1, NEVER delete the iPart members from their folder once they are in use within designs or iAssemblies. You will break association and potentially cause yourself A LOT of rework.
Rule number 2, DON’T assume all the members are regenerated. I experienced far too many occasions where a number of the members haven’t regenerated, post factory edits, when I was expecting them to. I found a failsafe though, if you change the value of a property in the factory, they regenerate without fail every time.
While this guide focuses on first-time creation, it’s important to build in stability for future edits you will almost certainly have to perform. For this reason, it's good practice to test applying some changes to your factories and make sure they translate into your members as expected. An even more thorough test would be to have the first version of members constrained in an assembly. That way when you regenerate the members you will be able to see if constraint errors occur, and tend to them immediately rather than after the iPart Factory has gone into ‘production’.

Create or Modify a custom iProperty called ‘Gen’ as shown in the image. This will force each iPart Member in the table to be regenerated.
- From the manage tab, Update the Mass, then Rebuild All. DON’T forget this, you may regret it later.
- Save your file.


- Highlight ALL the Members in the Inventor
Browser, then select Generate Files from the context menu. - Switch to Windows Explorer and browse to the
OldVersions folder found in the iPart Member folder shown here. - You should see the same number of OldVersions
files, as there were Members highlighted in the Inventor Browser. - You should also check the Date Modified properties of the files, to make sure they were generated within the expected timeframe.
You should now test your iPart Factory, by opening a new assembly, and placing the Factory. If everything has worked you will be able to place one of each of the members.
Autodesk Vault Check In
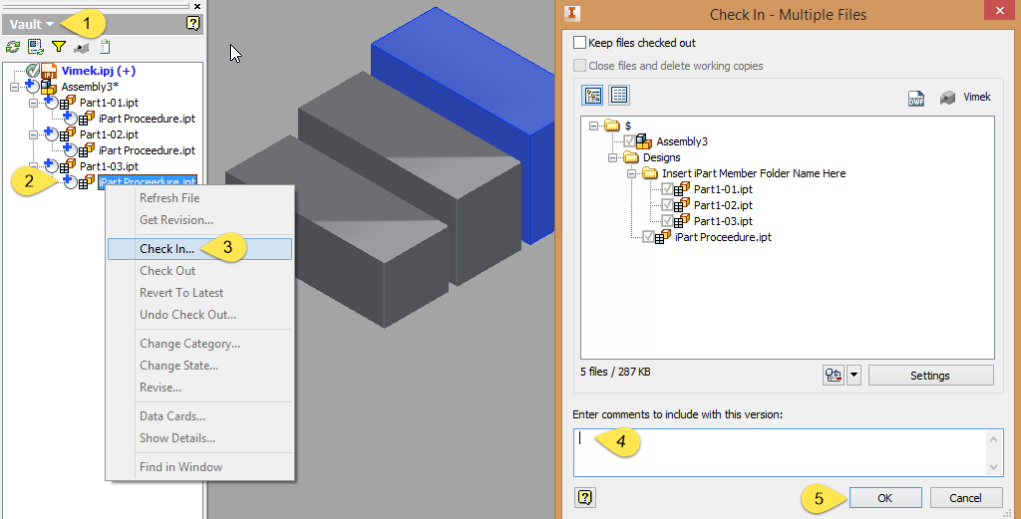
- Switch to the Vault browser
- Highlight the iPart Factory, make sure you expand at least one Member to get to it
- Check In from the context menu
- Add a comment to describe this version of the files
- Click Ok.
Congratulations, you have successfully created, published and Checked In an iPart Factory and its Members to Vault. Now, the next step is to get your head around Autodesk Inventor iAssembly Best Practices.