Engineering change order (ECO) roles in Autodesk Vault Professional
Managing engineering change orders (ECOs) in Autodesk Vault Pro can be a daunting task. This is because user routing roles and how they interact with the ECO process can be confusing. In this article, I will aim to demystify which user roles work at each stage of the ECO process.
Please note: The configuration steps outlined will need to be done by a Vault user who has an Administrator role.
User Permissions
Before we begin, ensure the users that are going to form part of the ECO have the necessary roles and permissions.
Users who participate in an ECO will need a Vault Pro or Vault Office license and they need to be assigned Change Order Editor Level 1, Change Order Editor Level 2, or Administrator (the administrator automatically receives Change Order Editor Level 2 permissions).

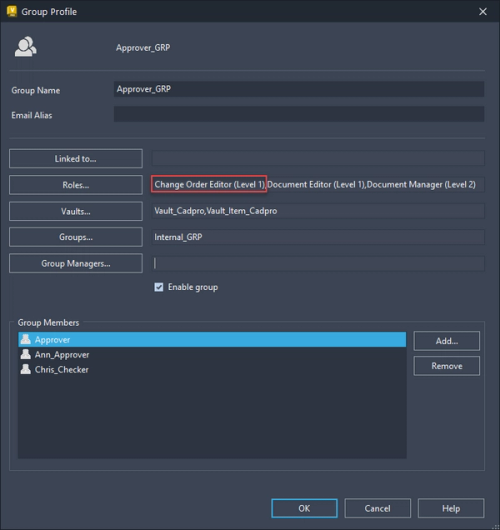
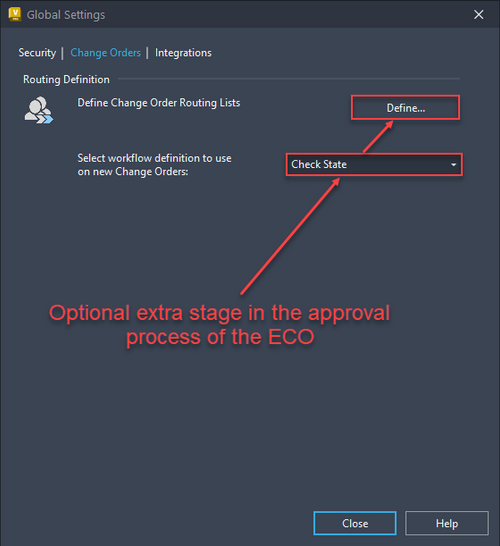
If the above is not completed, the user will not be listed in the Define Change Order Routing List, this is what we will configure next: Navigate to Tools > Administration > Global Settings and go to the Change Orders tab.
I am going to use the Check state to show the full ECO process, but if set to Standard, you will not have access to the CHECK ECO state, and the Checker role will not be available to assign. Once you have decided if you want the extra approval stage, click Define.
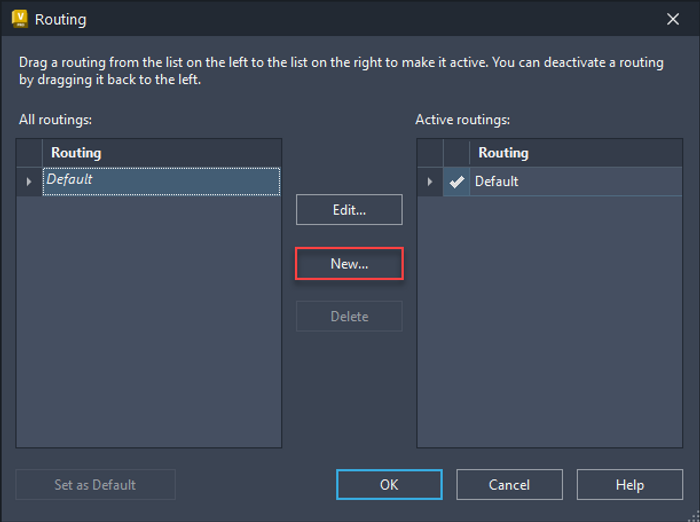
If you have a simple ECO process, you can edit the Default process, but most companies will need to create multiple options to allow for different approvals and editing options for multiple users. If you don’t make this change, the administrator will have to customise the Routing for each ECO. So, click New.
Now define the Routing Name on the top left, then add the first user you want to define in the ECO Routing.
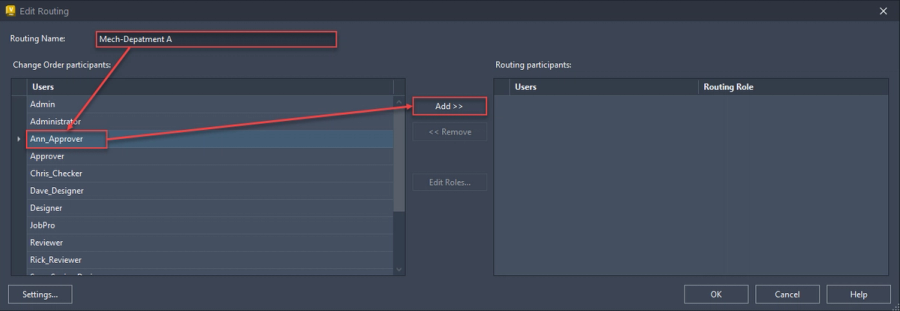
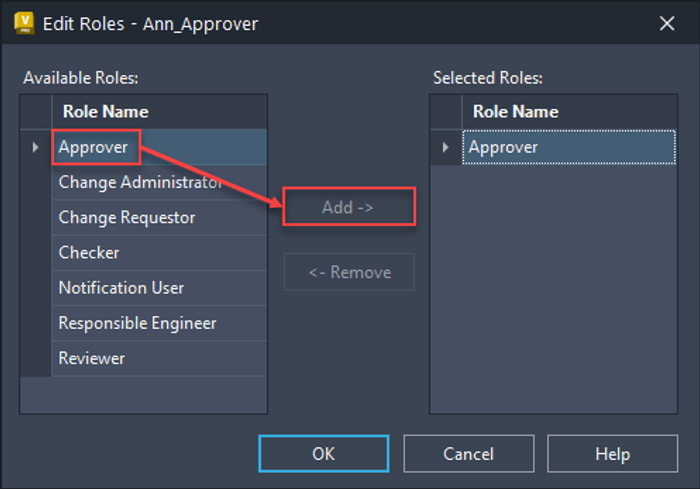
Select the appropriate role and add it to the right pane, I am looking at 'Ann_Approver' who will be approving the ECO when it is in the Review stage.
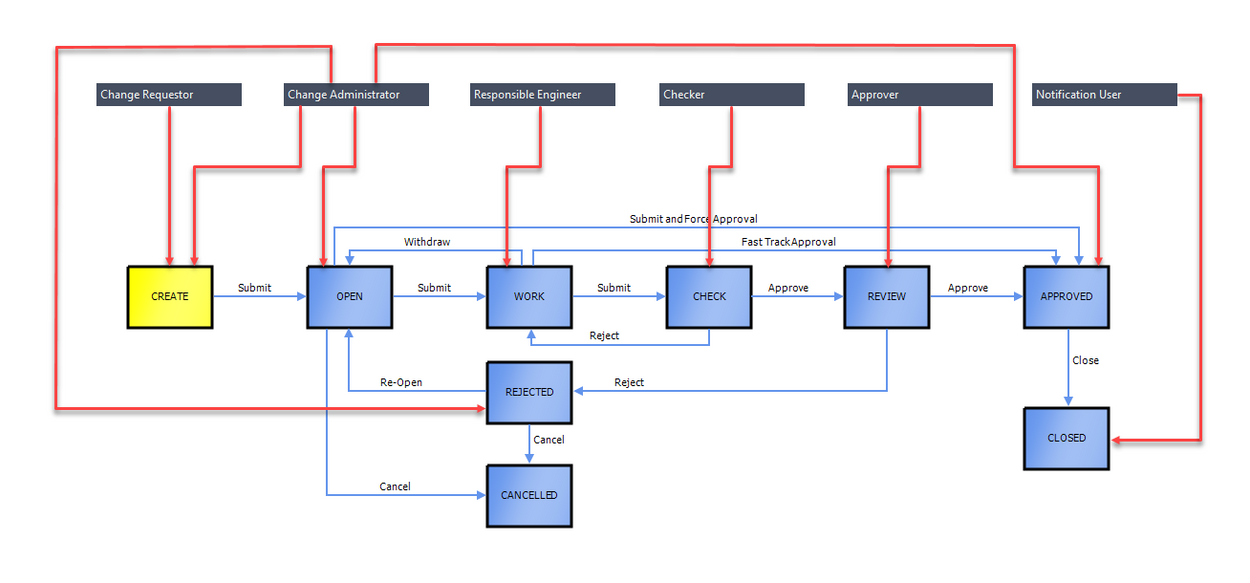
Below I show where in the ECO each of the “ECO Roles” will interact with the ECO. The image has been taken from the Status Tab of an ECO and the red lines indicate the participation of each role.
I have excluded the Reviewer role as it is not necessary to participate in an ECO, but they are able to add comments at each stage of the process. The user who creates the ECO (Change Requestor), automatically becomes the reviewer, this is so they can see the ECO move through the ECO states and add comments as required.
Routing Roles:
- Approver: Can review, approve, and reject a change order.
- Change Administrator:
- Can add or remove Approvers, Change Administrators, and Responsible Engineers.
- Can edit the title of the change order, add or remove files or items, and modify user-defined properties.
- An item becomes effective when it is released.
- The Change Administrator can also cancel the change order or reopen a rejected change order.
- Change Requestor: This participant initiated the change order and automatically becomes a reviewer.
- Checker:
- If Check State is enabled, a Checker is added to the list of routing participants when a work order is rejected.
- Can review, approve, or reject the change order.
- Note: The standard workflow does not include the Check State or Checker role.
- Notification User: Receives notification when the change order is closed.
- Responsible Engineer: Can edit the change order, make necessary revisions, and submit the change order for review.
- Reviewer: Can only view, add, and reply to comments
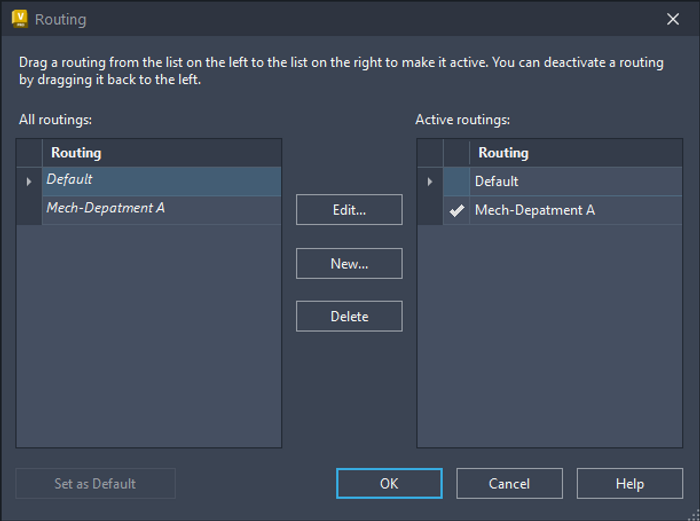
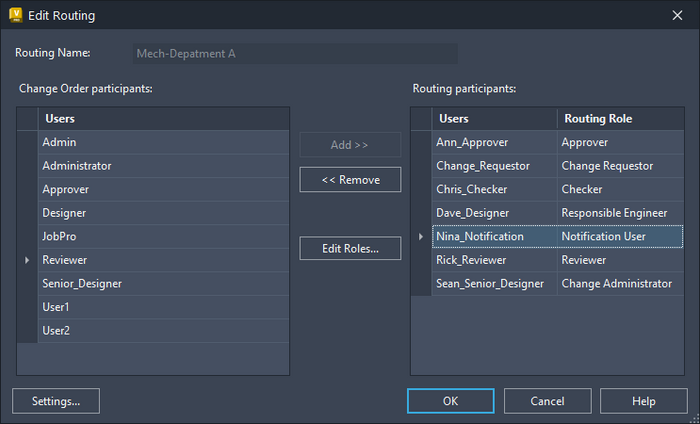
Repeat the steps of adding users with correct roles to ensure all the Routing Roles have someone assigned, and note that one person can cover more than one Role. Below is an example of a completed routing configuration.
When you have configured the routing, you can drag it from the left All routings column to the right Active routings columns, where it can be used or set as default by moving the check mark.
